![Hauptlogo_ChiliDigital_neg_weiss.svg]](https://products.chili.ch/hubfs/10_Visuelle%20Elemente/02_Logos/00_ChiliDigital/Hauptlogo_ChiliDigital_neg_weiss.svg)
ChiliDocs generates Word and PDF documents directly from your HubSpot CRM data. Upload Word templates with placeholders and ChiliDocs fills them automatically with data from your contacts, companies, deals, tickets, line items and custom objects. This lets you:
- Create quotes, contracts or letters with one click, directly from a CRM record.
- Generate documents automatically via HubSpot workflows and attach them to records (Pro).
- Keep every generated document in your own HubSpot file manager – right next to the record it belongs to.
Plans at a glance
| Free | Basic / Pro | |
| Generate from | Contact records (incl. data of the associated company) | All record types, incl. custom objects |
| Documents per month | 10 | Unlimited |
| Workflow actions | – | ✓ |
| Line-item tables, deal data | – | ✓ |
Installing from the Marketplace gives you the Free plan. You can upgrade to Basic/Pro at any time from within the app – see the section "Upgrade to Basic/Pro".
Install the app
Start from the HubSpot Marketplace
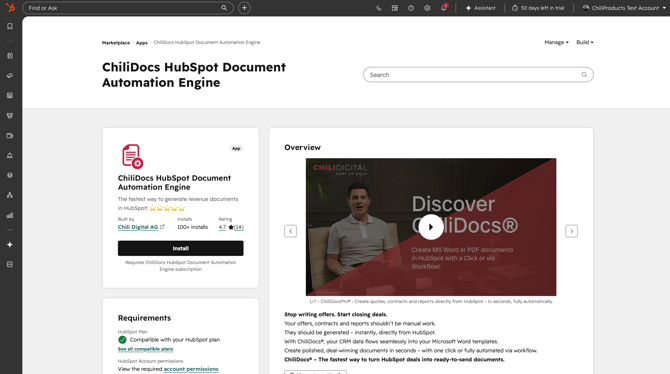
- In HubSpot, open the Marketplace (shopping-bag icon) > App Marketplace and search for ChiliDocs.
- On the ChiliDocs listing, click Install app. You are forwarded to the ChiliDocs sign-up page.
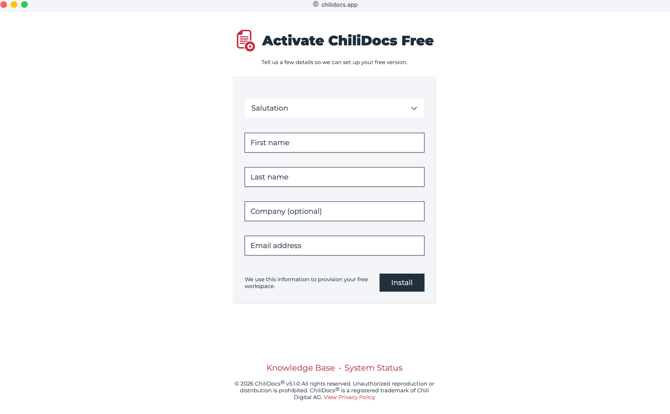
Complete the short sign-up form
- Fill in the registration form – salutation, first name, last name, company (optional) and email – and submit it. No payment details are required for the Free plan.
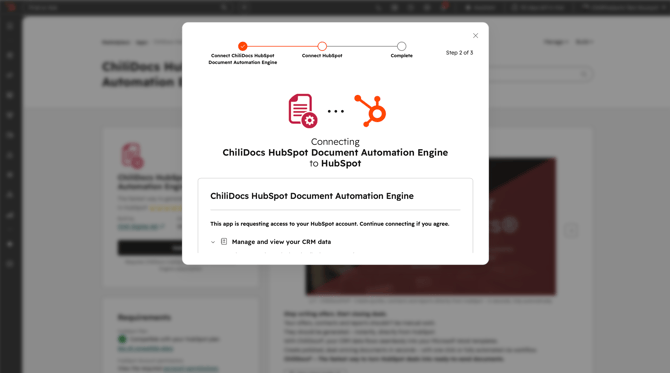
Connect your HubSpot account
- After submitting the form you are redirected straight to HubSpot's authorization prompt for the portal you are currently signed in to – no account selection needed. Review the requested permissions:
- Files – your templates and generated documents are stored in the file manager of your own HubSpot account.
- Contacts & companies – to fill placeholders and attach generated documents to records as notes.
- Owners, users & tickets – for owner/user placeholders and attaching documents to tickets.
- Workflow automation, custom objects & currency settings – optional permissions that HubSpot lists automatically on every install. Whatever your HubSpot subscription can't grant is skipped automatically and never blocks the installation. On the ChiliDocs Free plan these features aren't usable even when granted – they become active with Basic/Pro.
Installation finishes automatically
- ChiliDocs completes the setup in the background (exchanging credentials, creating your subscription and template folder) and returns you to HubSpot automatically.
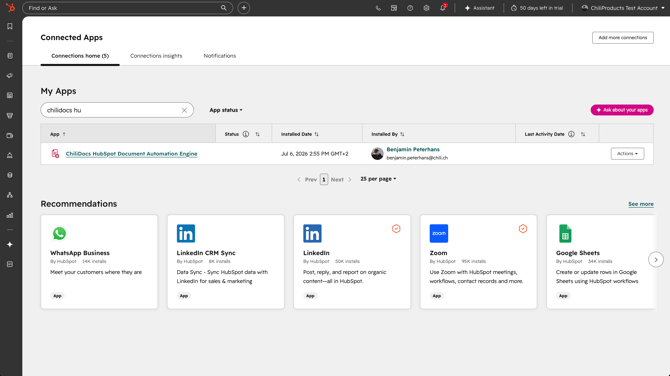
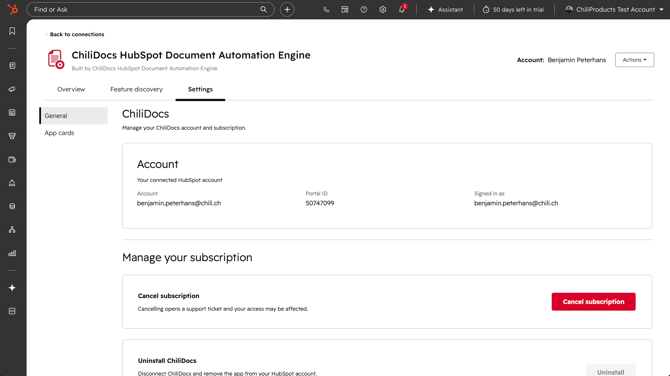
- ChiliDocs is now visible under Settings > Integrations > Connected Apps. Before the ChiliDocs card appears on your records, you need to enable it once – see "Enable the ChiliDocs card (one-time opt-in)" below.
Upgrade to Basic/Pro
You can upgrade from Free at any time:
- Open the upgrade page via the Upgrade link in the ChiliDocs card (shown when you hit a Free-plan limit) or in the ChiliDocs app settings. The page opens in a new browser tab and shows a Free vs. Pro comparison.
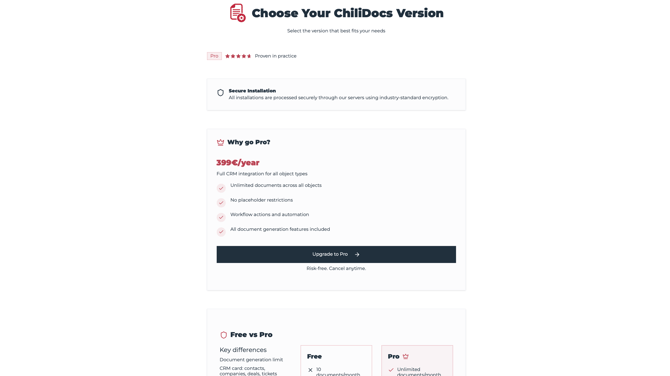
- Choose your path:
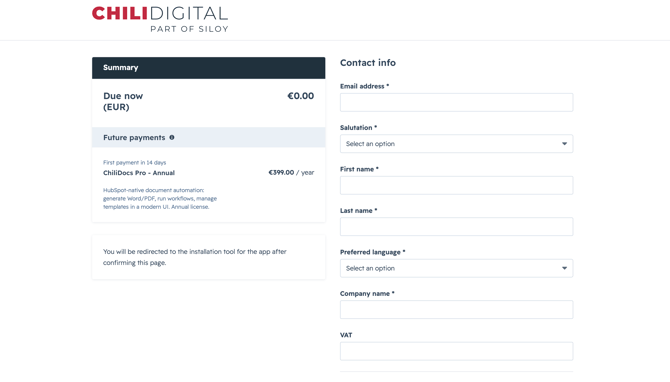
- Purchase: click Upgrade – you are redirected to the payment page. After completing the purchase you are returned automatically.
- Installation key: if you received an installation key from us, enter it in the key field and click Upgrade – no payment step.
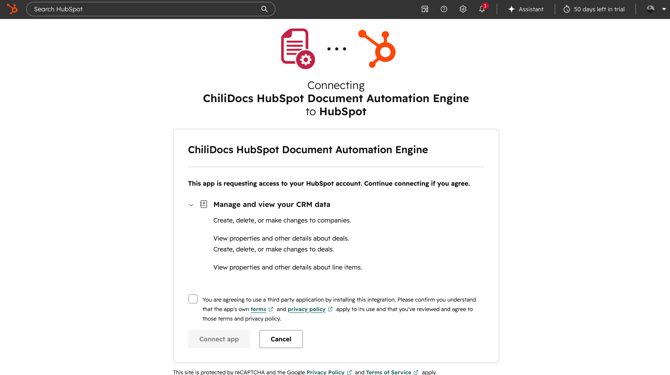
- Re-authorize with HubSpot: the consent screen now additionally includes the Pro permissions – deals & line items (quotes, deal documents, line-item tables). The optional permissions (workflow automation, custom objects, currency settings) are requested again; whatever your HubSpot subscription can't grant is skipped automatically and never blocks the upgrade.
- A progress screen shows each installation step live; when it finishes you see the success page. Workflow actions and all record types are now available.
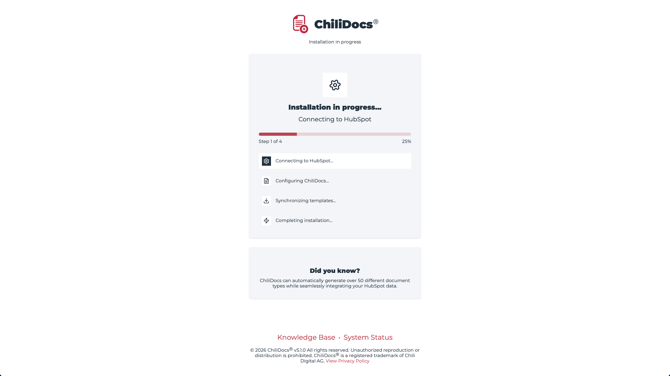
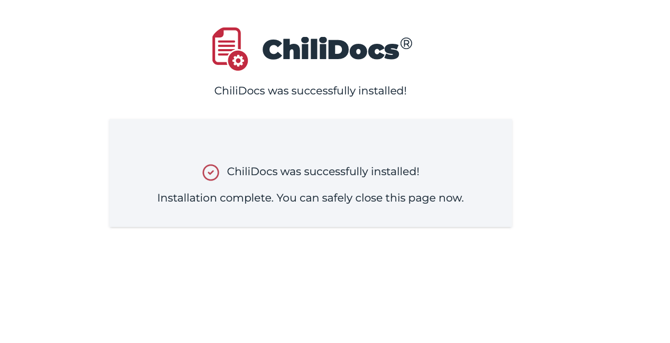
Direct Pro install with a key (no prior installation): if we provided you an installation key before you installed the app, open the install link we sent you (…/install?key=YOUR-KEY). The key is validated, you connect your HubSpot account (Pro permissions), and the same progress screen completes the installation.
Configure the app
Enable the ChiliDocs card (one-time opt-in)
ChiliDocs uses HubSpot's new UI extensions. The ChiliDocs — Generate document card does not appear on records automatically – you enable it once for the object types you want:
⚠️ Permission: only users who can edit integration apps (e.g. a Super Admin) can perform this opt-in. If you don't have these rights, contact your HubSpot account administrator.
- In HubSpot, open Settings (gear icon) and in the left sidebar under Account Management click Integrations > Connected Apps.
- Under My Apps, find and click ChiliDocs, then switch to the Settings tab.
- Open the App cards section and click Manage locations.
- Enable ChiliDocs for the desired objects – recommended: the record page, with the checkbox in the Middle column – and click Save.
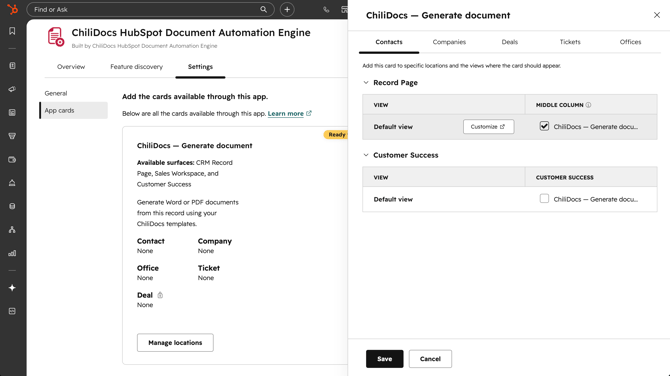
After saving, the card appears in the middle column of the selected records (alongside cards like Activity, Properties, Associations). Scroll down in the middle column if you don't see the card immediately.
Notes:
- Free plan: the card only works on contact records. You can opt in other object types, but the card won't be shown or won't function there without a paid plan.
- If the card is visible to you but not to some team members, this is usually caused by HubSpot team views – see ChiliDocs card not appearing for users in teams.
- Detailed opt-in walkthrough with screenshots: Enable ChiliDocs – opt-in for the new UI extensions.
Your template folder
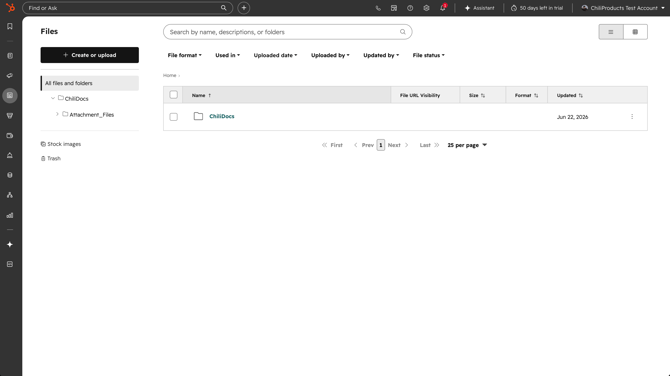
During installation, ChiliDocs creates a folder named ChiliDocs in the file manager of your HubSpot account (Library > Files). This folder holds your document templates; generated attachments are stored in its Attachment_Files subfolder (managed automatically – don't put templates there).
Create a template
Templates are regular Word files (.docx) containing placeholders in square brackets, for example:
Dear [firstname] [lastname],

thank you for your interest. Your point of contact is [owner.firstname] [owner.lastname].
- Placeholders map to the HubSpot property names of the record you generate from.
- Owner properties are available via placeholders like
[owner.firstname]. - Pro: line-item tables let you output the line items of a deal or quote as a table – including filters and currency formatting.
- Placeholders also work in the template's file name –
Quote [dealname].docxbecomes e.g.Quote Acme Renewal.pdf.
You'll find the full placeholder reference (tables, filters, formatting functions) in our knowledge base under "Placeholders & control characters".
Upload and organize templates
- In HubSpot, open Library > Files and go to the ChiliDocs folder.
- Upload your .docx templates.
- Optional: group templates in subfolders. Pro: name a subfolder after a deal or ticket pipeline to make its templates appear only on records in that pipeline.
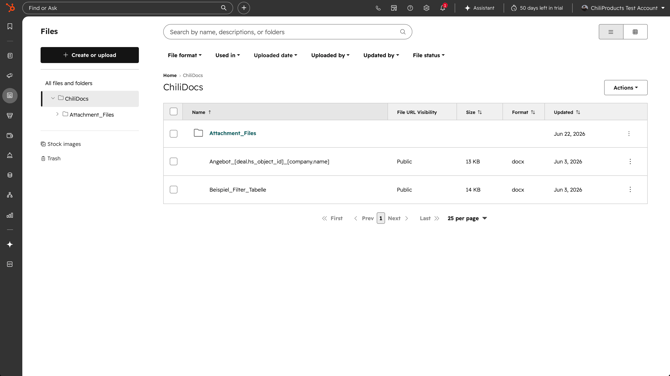
New templates appear in the ChiliDocs card immediately – no sync step needed.
Use the app
Generate a document from a record (manual)
- Open a record – a contact on the Free plan; any contact, company, deal, ticket or custom-object record on Pro. (The card must be enabled first – see "Enable the ChiliDocs card".)
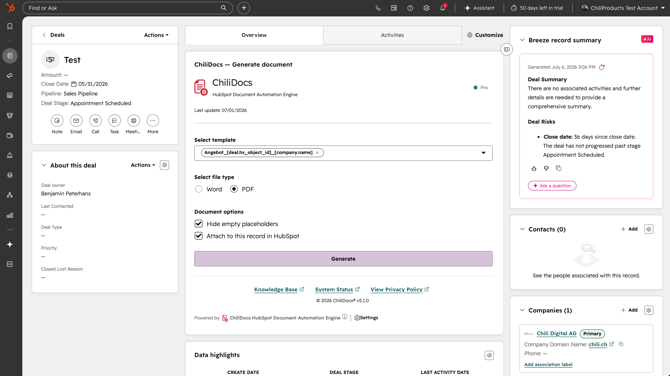
- Scroll to the ChiliDocs — Generate document card in the record's middle column.
- Select a template, choose the file type (Word or PDF) and set your options: Hide empty fields – removes placeholders that have no value instead of leaving them blank. Attach as note – pins the generated document to the record's timeline as a note with attachment. Your choices are remembered for next time.
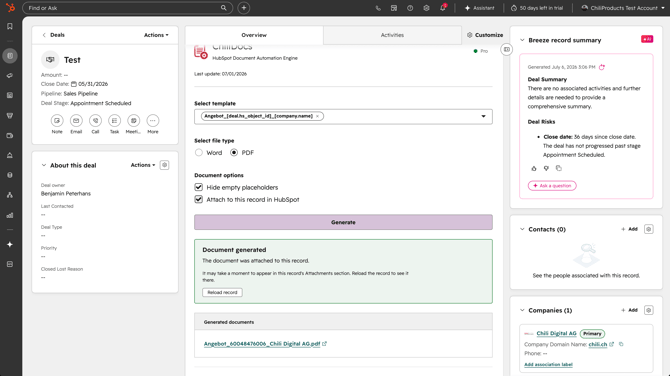
- Click Generate. When the document is ready, a download link appears – PDFs open in a browser preview, Word files download directly.
The card also shows your current plan and, on Free, your remaining monthly document quota with an upgrade link.
Generate documents automatically (Pro – workflows)
ChiliDocs provides two actions for HubSpot workflows:
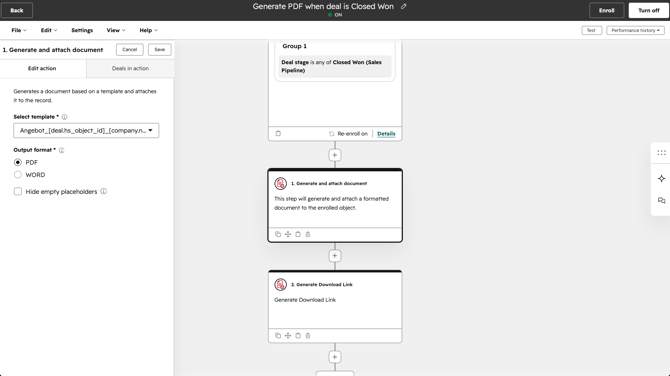
Generate and attach document
- In a workflow, click + and choose Generate and attach document under ChiliDocs.
- Configure: Select template, Output format (PDF or Word) and optionally Hide empty placeholders.
- When the workflow runs, the document is generated and attached to the enrolled record. The action outputs the File ID for use in later steps.
Generate download link
Creates a shareable download link for a generated document – either by searching by filename or via the File ID from a previous "Generate and attach document" step (e.g. to include the link in an email).
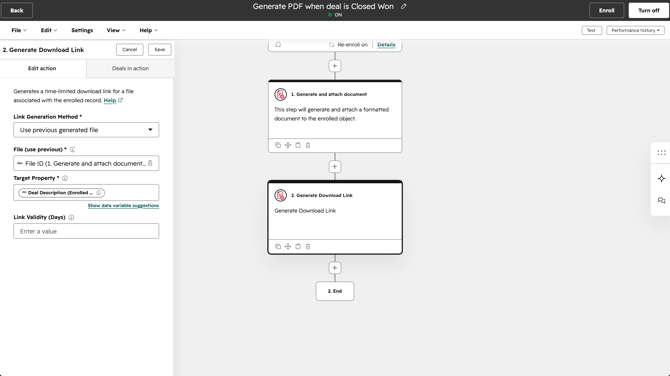
Workflow actions require a ChiliDocs Pro plan and a HubSpot subscription that includes workflows.
Disconnect the app
Removing ChiliDocs from HubSpot's Connected Apps page revokes its access without deleting your ChiliDocs account data:
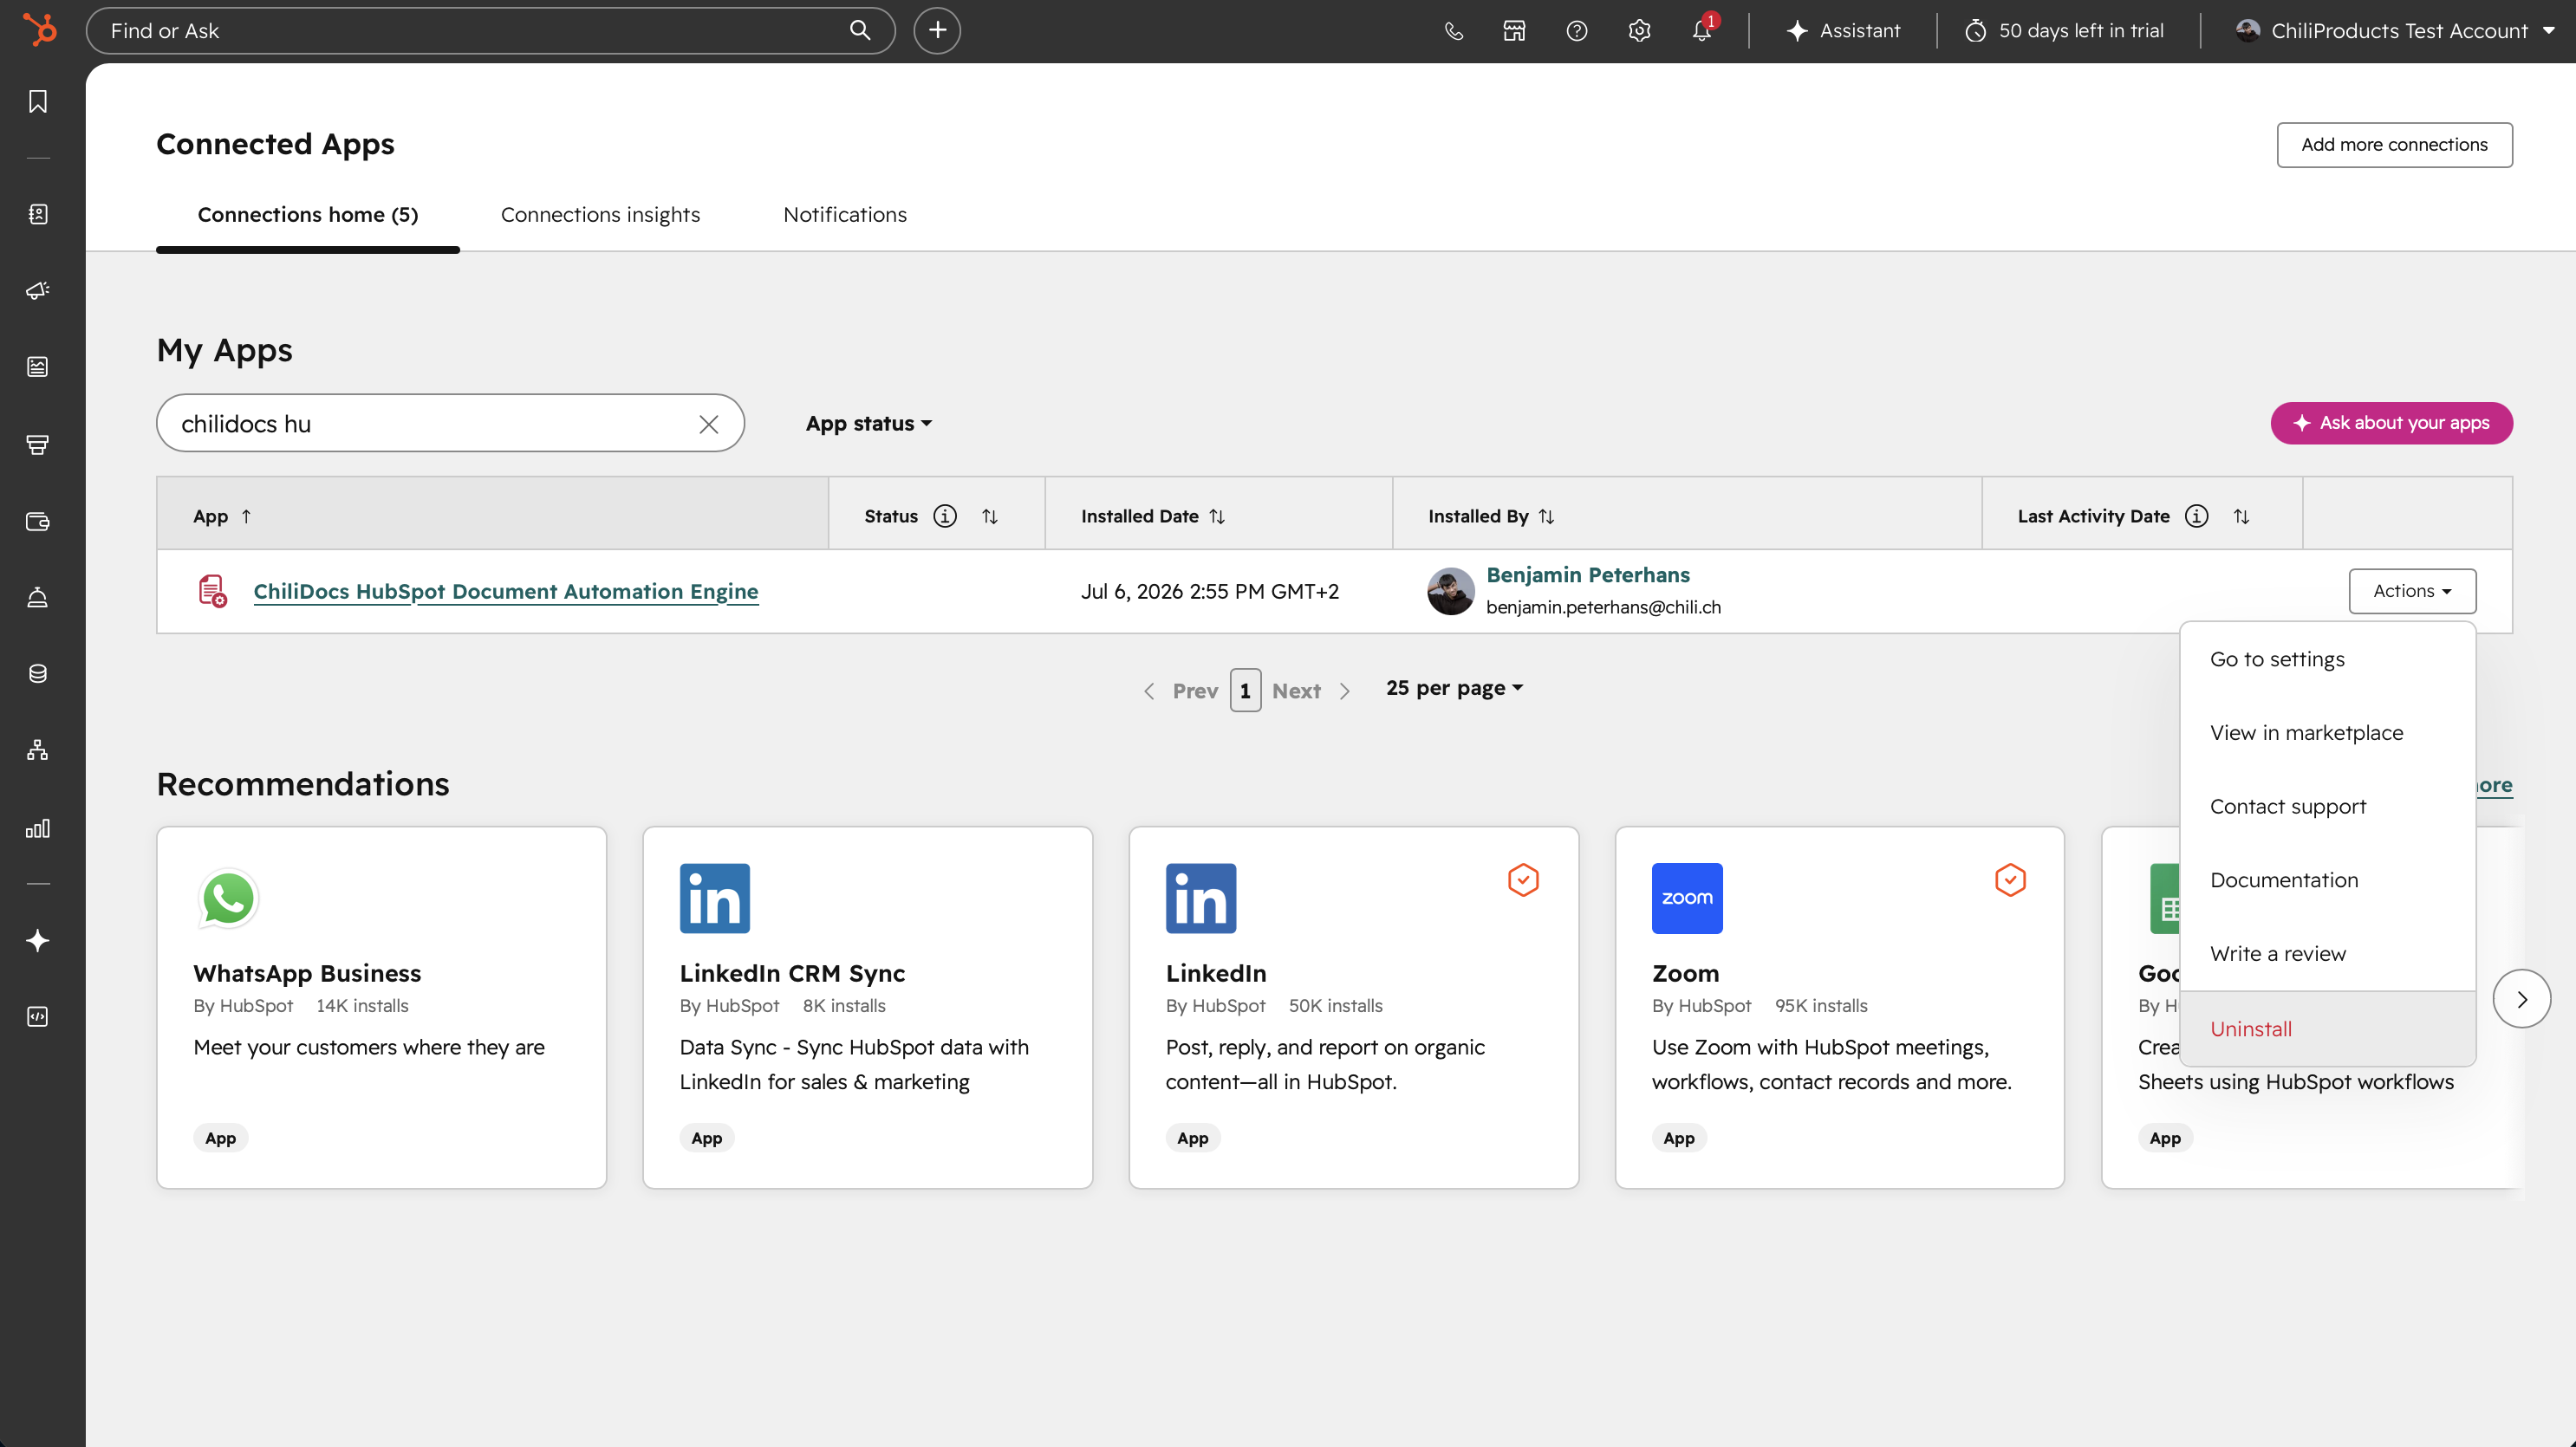
- In HubSpot, open Settings > Integrations > Connected Apps.
- Find ChiliDocs, open its actions menu, choose Uninstall and confirm.
Effect: ChiliDocs' access to your HubSpot account is revoked immediately – document generation and workflow actions stop working. Your data is not deleted: templates and generated documents remain in your HubSpot files, notes and attachments remain on your records, and your ChiliDocs subscription stays in place. Reinstalling the app from the Marketplace restores functionality (an existing Basic/Pro subscription is recognized automatically and never downgraded).
Uninstall the app
To fully remove ChiliDocs – including the data ChiliDocs itself stores – use the uninstall function in the ChiliDocs app settings:
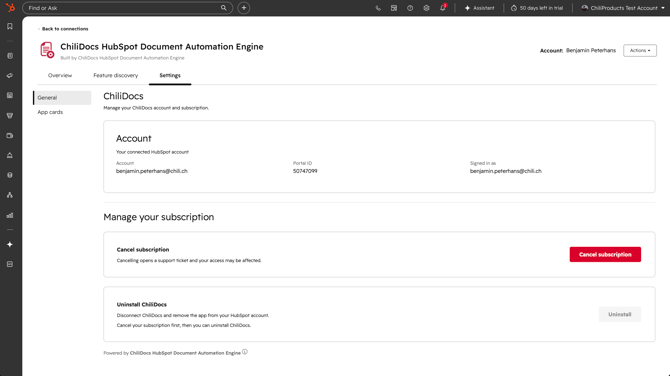
- In HubSpot, open Settings > Integrations > Connected Apps > ChiliDocs and go to the ChiliDocs App Settings page.
- Paid plans: click Cancel subscription first and confirm. Uninstalling becomes available once the cancellation is registered. (Free plans can uninstall directly.)
- Click Uninstall and confirm.
This removes the app from your HubSpot account, revokes and deletes the stored access tokens, and deletes the data ChiliDocs holds about your portal (see below).
See also HubSpot's guide to uninstalling apps.
What happens to your data?
Stays in your HubSpot account (yours – never touched by uninstalling):
- All generated documents in your HubSpot files, plus every note/attachment on your records.
- Your templates in the ChiliDocs folder.
- All CRM data – ChiliDocs never modifies your CRM records beyond the document/note attachments you requested.
Deleted from ChiliDocs when you uninstall:
- Your HubSpot access tokens (access is revoked immediately).
- Document generation logs, installation keys and payment session data.
Retained temporarily: anonymous monthly usage counters (no personal data, no document contents) are kept for up to 12 months to prevent quota abuse, then deleted automatically.
ChiliDocs never stores copies of your generated documents or CRM data on its own servers – documents are created in memory and saved directly to your HubSpot files.
For details on data processing, see our Data Processing Agreement.
Need help?
- Knowledge Base: products.chili.ch/en/knowledge/chilidocs
- System status: products.chili.ch/en/system-status
- Support: products.chili.ch/en/support